Like this 8.8 inch with 1280 x 480 resolution instead of your OEM 6.5 inch with 600 x 800 resolution?
Wish to upgrade it by yourself? Now you can!
Here are the tools that you need!
1) Panel Clip Pry Open Tool
2) A Torx screwdriver (T20 size)
3) 8.8 inch screen for F45/F46 (Part number: 9370871 or 9387450)
Note: X1 F48 also uses similar screen but the part number is 9387451. It requires CID trim (part number 9353267 for Right hand drive car) to be installed together.
Can't wait to begin?
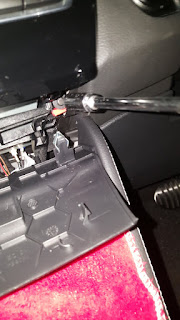
Step 1 : Use the pry open tool to pry the plastic cover underneath the CD drive. Remember not to pull out the plastic cover and you can simply leave it hanging. Note that there is a wire attached for ambient lighting.
Step 2 : Underneath the CD cover, you can find two torx screws attached to it. Unscrew them as shown below.
Step 3: Once the screws are removed, take out the cover together with the buttons and leave it hanging as shown below.
Step 4: WARNING!!! This is the hardest part! You have to remove the entire aircon dashboard using the pry open tool. Note that this will take some effort as the aircon dashboard is held tightly by the clips.
There are two separate wires connected to the air con dash board. One for the ambient lighting on the left area and the other for hazard light/lane departure buttons. Remember that there are 3 x aircon vent modules( one on the left, 2 at the center) which may dislodge by themselves and you have to fit it back slowly.
Important strategy to pry the aircon dash board off from the car.
Check out the arrows and follow the numbered sequence:
Observe the arrows highlighted in orange. These are the areas that are safe to pry. If your car comes with lighting package, do not pry open on the area marked with a red cross as it will potentially breaks your fibre optic lighting hidden underlying the dash.
You will need to use some strength to pry open all corners of the dashboard slowly. Use cloth to protect your dash board and glossy surfaces from scratches.
Do not pull those air con vent flaps by hand as it will detached itself easily and you will find yourself spending most of your time trying to assemble the flaps back instead of installing the screen!
In the event that those aircon vent module drop out from the air con dash, you have to snap the module back to the dash first before pushing the entire air con dash back to the car.
Note the highlighted areas where the aircon module needs to be clipped back onto the aircon dash before putting the entire dash board over to the car.
Warning: Remember that there are no more screws held within the air con dash board and you have to pry it open with full confidence! I will not be held responsible for any damages made to your dashboard during this process and there may be risk in damaging the clips or even the entire dashboard during the process. It is recommended to have two person to perform this job if you are doing it the first time.
Here are the closeup photos of the aircon dash board. Notice the underneath highlighted area of the clips which you will need to pry it open.
Left area:
Right area:
Step 5: After some effort, the aircon dash board is finally released from their locks and you can leave it as hanging as shown below. Remember that there are two wires connected to it and do not pull out the whole dash board. Unscrew the two screws that held the 6.5 inch screen as shown below:
Step 6: Lift up the screen and check the back of the screen. There is a purple connector which provides the power and signal to the screen. Notice that there is a clip on the purple connector which you will need to push to unlock before pulling it out. It is held tightly and you may need the prying tool to assist in pulling it out.
Step 7: Replace it with the new 8.8 inch. The display will not show anything until you had performed your coding.
Step 8: Time to code!
Change the screen resolution and split screen options by setting the following options:
Infotainment
Screen | HU_ENTRYNAV | 3000 HMI | DISPLAY_SIZE_RESOLUTION | 8.8_1280x480 |
Infotainment
Screen | HU_ENTRYNAV | 3001 EXBOX | DISPLAY_VARIANTE | breites_display |
Success!
Step 9: Put your new 8.8 inch screw display back to the holder and screws it back using the same set of screws. Be very careful and make sure you do not drop your screws into the holes at the central console. Put back your dash board by pushing it back till you hear the "click" sound and put back your CD covers and the plastic cover.


